On a fine Monday morning when you’re sipping on your cup of Joe, ready to get to work, your internet connection doesn’t play ball. Your screen flashes a message “Ethernet doesn’t have a valid IP configuration,” but this is no reason to pour your hot coffee on the screen. We answer the common question how to fix “Ethernet Doesn’t Have a Valid IP Configuration” in Windows 10.
What Causes the “Ethernet Doesn’t Have a Valid IP Configuration” Windows 10 Error
Your computer needs an IP address to be able to communicate with your router and access the internet. If your computer doesn’t have an IP address, you’ll get the Ethernet IP configuration error and won’t be able to get online.
In most cases, you can thank your NIC (Network Interface Card) for the error. If your NIC is somehow damaged, has become outdated, or just doesn’t want to work for whatever reason, you’ll receive the “Ethernet doesn’t have a valid IP configuration” error.
“Ethernet Doesn’t Have a Valid IP Configuration” Windows 10 Fixes
Below are some quick fixes that will help you eliminate this pesky error and get your internet up and running again.
Method 1: Restart Your PC and Router
The “turning it off and on again” approach sounds like a simpleton’s choice, but you’ll be surprised by just how many errors it can fix. When you restart your PC, it will reset all the incoming and outgoing connections on your computer, which could help solve your IP configuration error.
While you’re at it, power cycle your router. It will give your router a chance to configure a new IP for your device. Turn it off using the power button (or cut off the power supply). Let it sit for 60 seconds and press the power button (or plug the cable back in). Once all devices are back on, see if you’re able to access the internet.
Method 2: Disable and Enable Your Network Adapter
Resetting the network adapter can also give your system a chance to reconfigure the IP. To reset the network adapter:
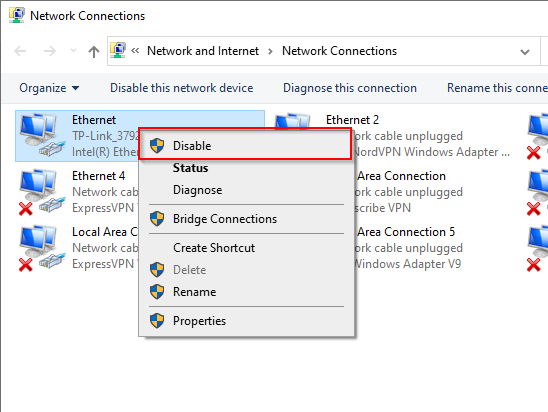
- Press Win + R, type ncpa.cpl, and press Enter to open Network Connections.
- Next, right-click on your Ethernet network adapter, and select Disable.
- Wait a few seconds and right-click on the adapter again. Select Enable.
This should give Windows 10 a new IP and fix Windows 10 Ethernet doesn’t have a valid IP configuration error.
Method 3: Enable or Disable DHCP
While you’re in the Network Connections window, look at the network adapter’s properties to see if DHCP is enabled or disabled. Alter its state from what it currently is.
- Right-click on the network adapter and select Properties.
- Next, double-click on Internet Protocol Version 4.
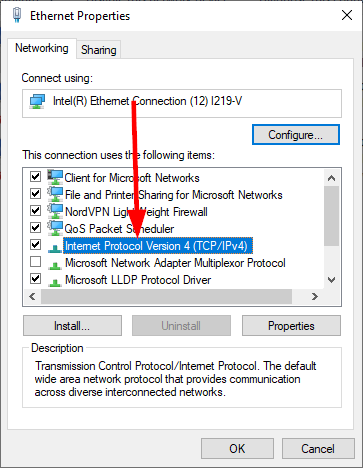
- If the radio button besides Obtain an IP address automatically and Obtain DNS server address automatically is shaded, DHCP is enabled. If it’s disabled on your system, enable it by selecting both the automatic options.
- Disable DHCP by selecting Use the following IP address and Use the following DNS server address.
- Next, fill in the following details in each of the five fields:
IP address: 192.168.1.20
Subnet mask: 255.255.255.0
Default gateway: 192.168.1.1
Preferred DNS server: 8.8.8.8
Alternate DNS server: 8.8.4.4

- Press OK.
Method 4: Reset Winsock
Winsock (Windows Socket) is an application programming interface (API) that handles input and output requests to and from applications that use the internet on a Windows system. Resetting it could help your system reconfigure its IP.
Resetting Winsock requires you to run two commands. However, it’s also a good idea to run a few other commands that could help reconfigure your IP.
- Press Win + R, type cmd, and press Ctrl + Shift + Enter to launch an elevated Command Prompt.
- Next, run the following commands one after the other (i.e., press Enter after typing each command):
Ipconfig /flushdns
ipconfig /renew
nbtstat -R
nbtstat -RR
netsh int ip reset
netsh winsock reset
- Restart your PC.
Finally, when your system restarts, see if your internet access is back.
Method 5: Update Network Adapter Driver
Windows ensures that you’re running the most updated drivers. Nevertheless, you could still run into an occasional error because of a driver. Manually updating the driver isn’t all that difficult and definitely worth a shot.
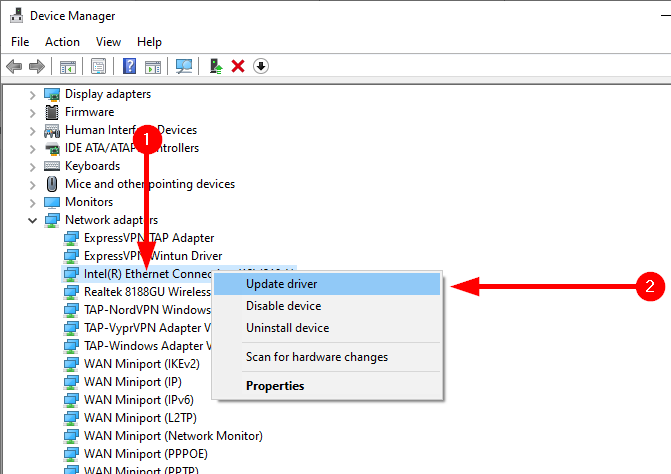
- Press Win + R, type devmgmt.msc, and press Enter to launch the Device Manager.
- Look for Network adapters, expand the list, and search for your Ethernet adapter. Typically the driver will have the word “Ethernet” in its name.
- Right-click on the adapter and select Update driver.
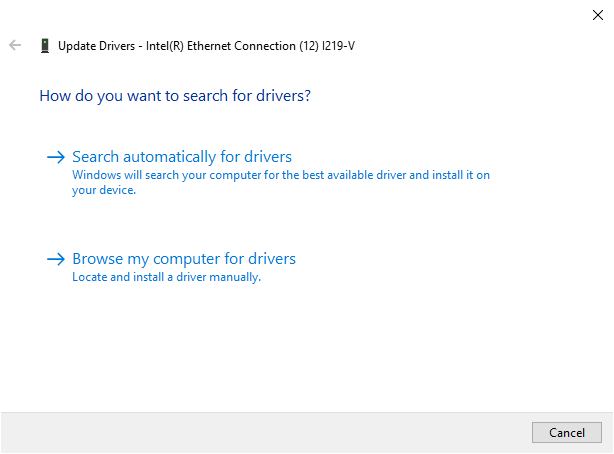
- If you have the drivers downloaded from your manufacturer’s website, choose Browse my computer for drivers, otherwise let Windows Search automatically for drivers.
Method 6: Reinstall Network Adapter Driver
If your driver is already up-to-date, uninstall the driver and reinstall it. To reinstall the driver, keep the Device Management console open and:
- Right-click on the Ethernet adapter and select Uninstall device.
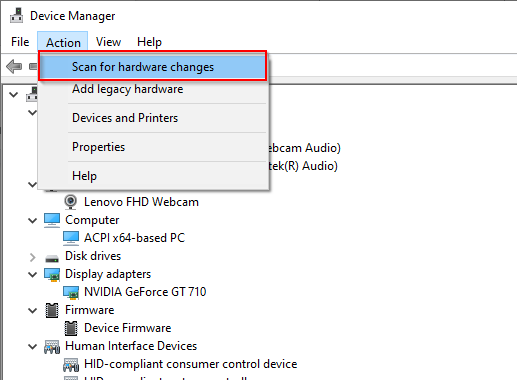
- Once the adapter disappears from the list, click on Action from the console’s top ribbon and select Scan for hardware changes.
- This should reinstall the device. Alternatively, you could just restart your PC and that will reinstall the driver as well.
Conclusion
These are the best fixes that you can try to regain your internet access if you’re encountering the “Ethernet doesn’t have a valid IP configuration” error. This error can be especially annoying if you’re trying to get some work done, but hopefully one of these fixes worked for you. If any of our methods helped you, or if you have a different method to resolve the IP configuration error, leave us a comment below.