Whether you are working from home, taking online classes, or just chatting with friends, Microsoft Teams may get in the way of your morning routine. Although it is relatively easy to use, this application can cause some headaches. In a few simple steps, we show users how to disable Microsoft Teams, and how to stop the program from automatically starting when Windows boots up.
Disable Teams on Startup
In order to disable Microsoft Teams from starting up with your Windows computer, there are a couple of settings that need to be changed. Once these changes have taken place, simply restart your computer to ensure that Teams no longer starts with Windows.
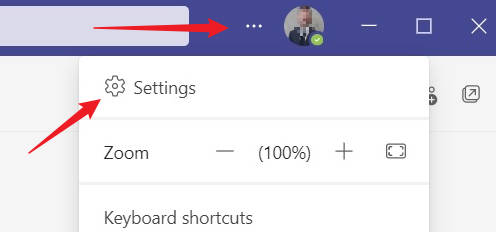
First, open the Teams application and select the 3 dots in the top right corner. Next, select “Settings”.
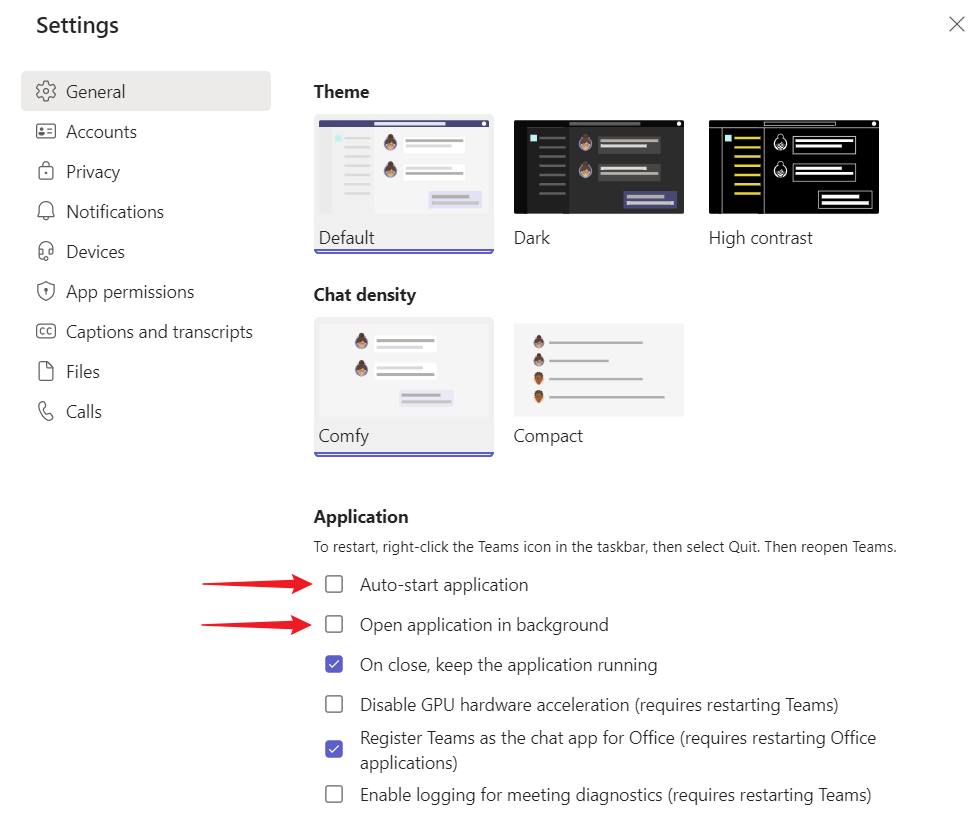
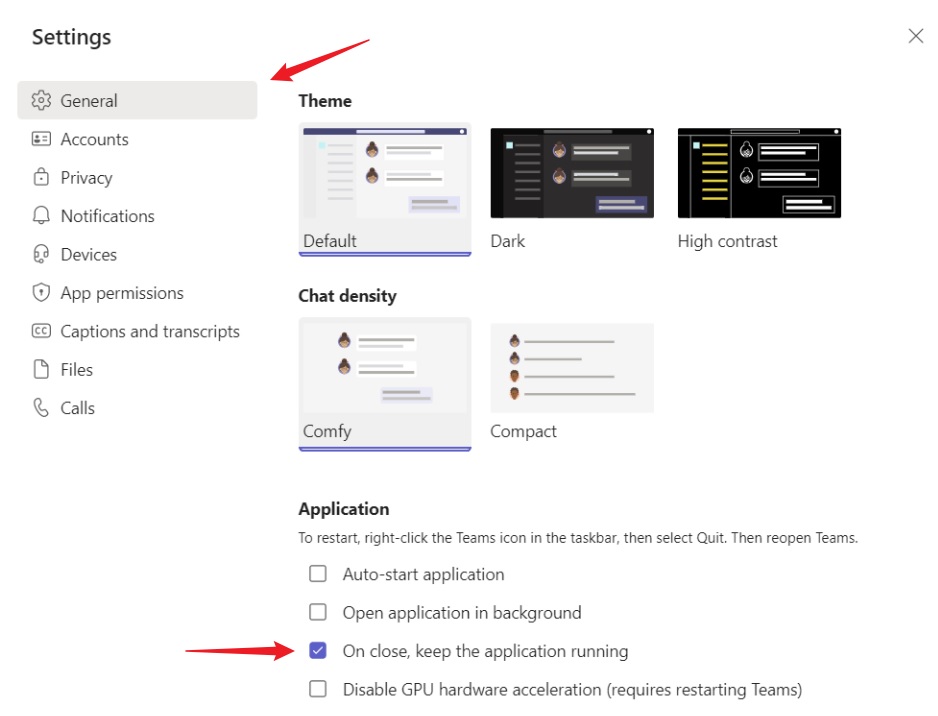
When the Settings window appears, click on the General tab and uncheck “Auto-start application”, as well as “Open application in background”.
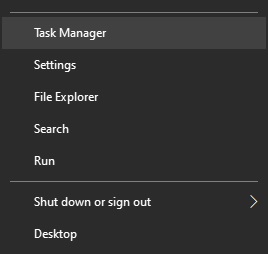
Finally, open the Windows Task Manager and disable Teams in the Startup tab. To do this, right click the Windows start menu icon and select Task Manager.
Now that the Task Manager is open, navigate to the Startup tab at the top of the page. Find and select Microsoft Teams, and click disable in the bottom right corner.
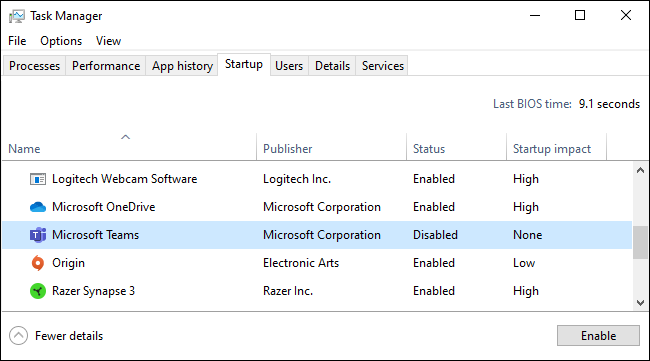
Once complete, Microsoft Teams should display as “Disabled” in the Status column of the Startup screen.
Prevent Teams From Running in the Background
Once running, Microsoft Teams likes to stay open in the background of your computer even if you close the application by clicking close in the top right corner. Although this may be useful for receiving work or school notifications, it may be difficult for some users to turn off.
To prevent teams from running in the background, start by opening the Teams application, and selecting the 3 dots in the top right corner. Next, select “Settings”.
When the Settings window appears, click on the General tab and uncheck “On close, keep the application running”.
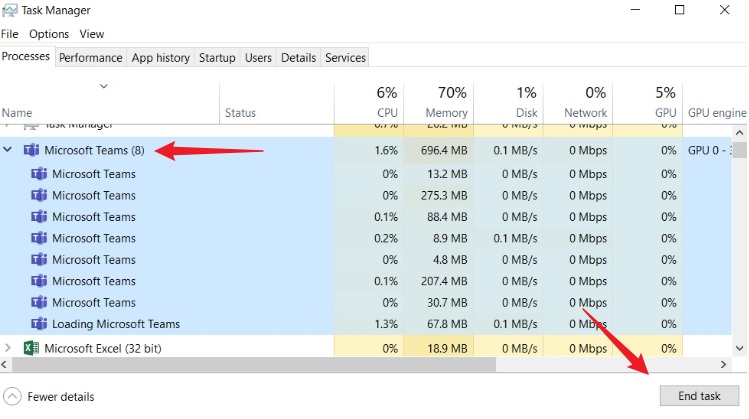
Now you can close Teams using the X icon in the top right corner. If this doesn’t work, force close the application by opening the Task Manager and ending the Microsoft Teams process.
To do this, right click the Windows start menu icon and select Task Manager.
Next, select the Teams process (there may be more than one) and click “End task” in the bottom right corner.
Microsoft Teams should now close, and no longer be running in the background of your Windows computer.
How to Uninstall Microsoft Teams
Tired of dealing with Microsoft Teams? Users can easily uninstall the program from their personal computer in a few simple steps. You can always re-download and install the latest version of Teams by navigating to the official Microsoft website.
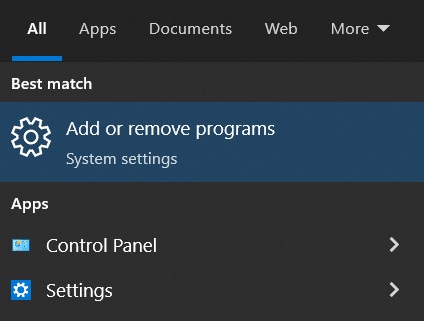
To uninstall Microsoft Teams, open the Windows start menu and search for “Add or remove programs”.
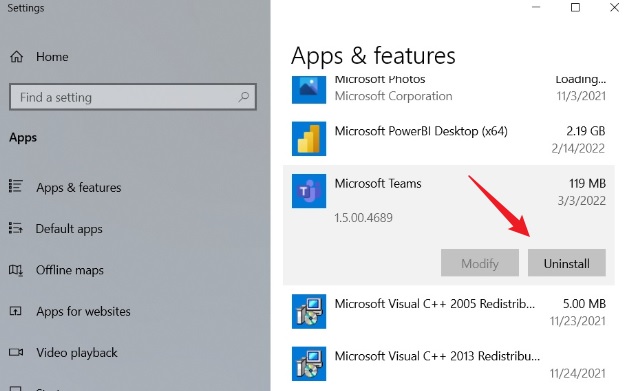
Once opened, scroll down until you find Microsoft Teams under the Apps & features.
Finally, click “Uninstall”.
A Microsoft screen will appear, guiding you through the quick uninstall process. Once complete, restart your computer and Teams will no longer be installed.
Conclusion
In a few steps, users can easily disable teams from booting up with Windows, stop the application from running in the background, and even uninstall the program altogether. To reinstall a fresh copy of Teams, navigate to the Microsoft website or download the app from the Microsoft store.