AirDrop is a quick and convenient method for sharing files between local apple devices. The biggest difference between using AirDrop compared to a service like Messenger or Email, is that with AirDrop the attachments are not going through a service. As long as both devices are in the same room and have Bluetooth enabled, you can easily transfer files. But where do these AirDrop files go on an iPhone? Let’s explain.
How to Save Files from AirDrop on iPhone
When using a MacBook, users are given the option to select where their AirDrop files get saved. Unfortunately, this isn’t the case for iPhone as they automatically save to the app that is associated with their file type. For example, pictures and videos will be saved to the Photo app, and contacts will be saved in Contacts. In order to save files from AirDrop onto your iPhone, you must first make sure that your iPhone is ready to receive AirDrop files.
Buy a product from this article:
iPhone 11 (Available on Amazon)
MacBook (Available on Amazon)
How to enable AirDrop on your iPhone
In order to be able to share files instantly with nearby devices, follow these steps.
- Open Settings.
- Tap on General.
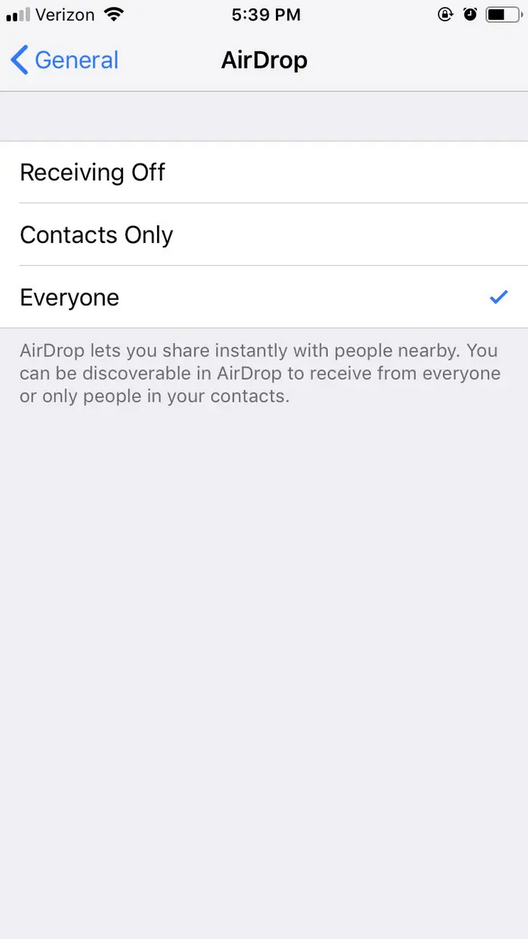
- Tap on AirDrop. Here you will see three different options.

Select if you do not want to receive any files, want to receive files from only your contacts, or if you would like to receive files from everyone. For security purposes, we recommend choosing Contacts Only.
Once someone AirDrops you, there will be a pop-up message asking if you would like to accept or decline the file. Once you click accept, navigate to the app associated with the file that you accepted. For example, if you accepted an image, navigate to the Photos app to see the picture.
If you have any difficulty finding the new files in the particular app, try the process again. If you are still having any difficulty, make sure that you have enough free storage space to accept downloads on your device. Still need assistance? Leave a comment below and we will help you out!