OneDrive is a cloud based file hosting service offered by Microsoft. This program is usually preinstalled on Windows 10 and Windows 11 computers. In this article, we answer the common question of “how to disable OneDrive in Windows 11”. From temporarily pausing the app, to completely removing the program from your computer, we’ve got you covered!
Method 1: Pause Syncing for OneDrive in Windows 11
If you are looking to still keep OneDrive on your PC, but want to stop it from syncing to your cloud storage follow the steps below. This may be beneficial if you are on a slow internet connection, or are facing the “Processing changes” warning message.
1. Click on the OneDrive icon in the bottom right corner of your taskbar.
2. Next, click on Help & Settings.
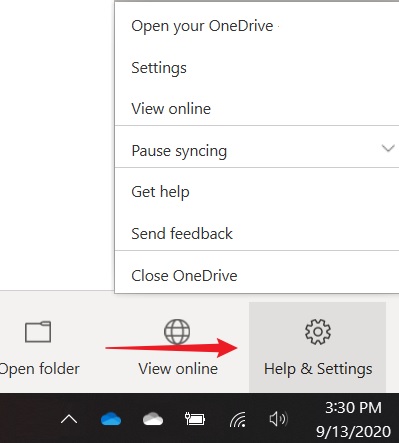
3. Finally, under the Pause syncing drop down menu, select how long you wish to pause the service for (2 hours, 8 hours, or 24 hours).
OneDrive will now pause from syncing for the duration that you selected. To resume syncing, follow the same steps and select Resume syncing.
Method 2: Unlink OneDrive in Windows 11
If you no longer want to use OneDrive on your Windows 10 or Windows 11 PC, the easiest solution is to unlink your account. By unlinking OneDrive from your computer, you will not lose any files or personal information. You can still access your files by navigating and signing into OneDrive.com in your web browser.
1. Click on the OneDrive icon in the bottom right corner of your taskbar.
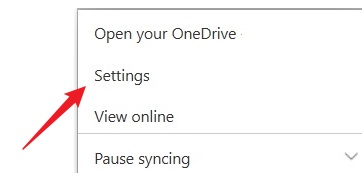
2. Next, open Help & Settings.
3. Select Settings.
4. Finally, on the Account tab, select Unlink this PC and then Unlink account.
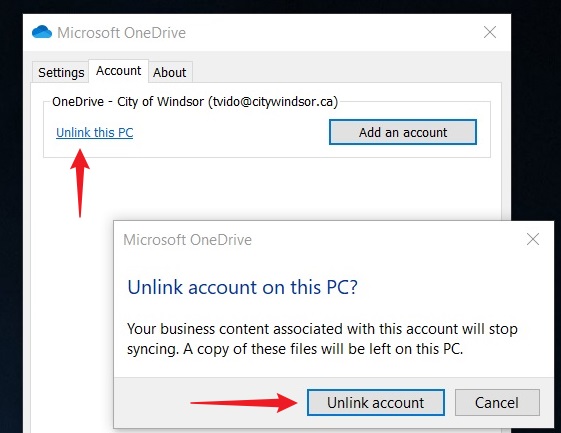
OneDrive is now unlinked from your Windows 11 computer! To access your files, simply link your account or sign in to OneDrive.com
Method 3: Uninstall OneDrive in Windows 11
By uninstalling OneDrive from your Windows 11 PC, the program will no longer be accessible as an app. However, you can still access your OneDrive files online. To uninstall OneDrive from your computer, follow the steps below.
1. Open the Start Menu and select Settings.
2. Next, choose Apps from the left menu and click on Apps & Features.
3. Once a list of programs has loaded, find Microsoft OneDrive.
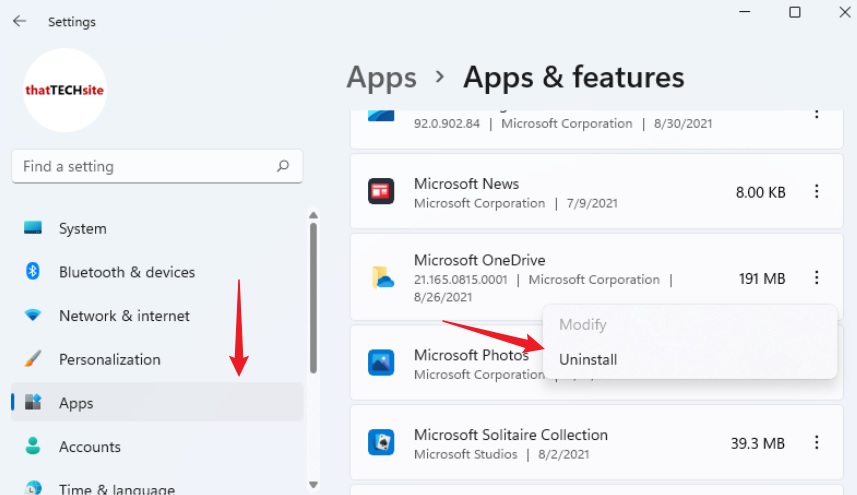
4. Finally, click the three dots on the right side of the screen, and select Uninstall.
Once you have gone through the uninstall prompts, reboot your PC for the changes to take effect.
Conclusion
We hope to have answered the common Windows question of “how to disable OneDrive in Windows 11”. Using the methods above, users will be able to disable the app from syncing, unlink their account, and completely remove the program from their PC. Leave a comment below and let us know if any of these methods worked well for you!