Windows 11 is Microsoft’s latest Operating System, released in October of 2021. Although this system is installed on most new laptops and PCs, users may still experience some bugs and glitches. In this article, we shows users how to fix a missing Wi-Fi option in Windows 11.
A missing Wi-Fi option could be the result of hardware issues, corrupt drivers, or even missing files. Users are unable to see the Wi-Fi icon in the bottom corner of their taskbar, and cannot select a network to connect to. Following this guide, users should be able to resolve the missing Wi-Fi bug and connect to their desired network in a timely manner.
Method 1: Run the Troubleshooter
Windows 11 provides several built in troubleshooters to fix common issues with drivers and features. We recommend running the Internet Connections troubleshooter as a first step in diagnosing a missing Wi-Fi option. This tools will quickly scan your computer to look for common problems, and fix them accordingly.
To run the Internet Connections Troubleshooter:
1. First, press the Windows Key + I on your keyboard to open the Settings menu.
2. Next, open the System tab in the left menu.
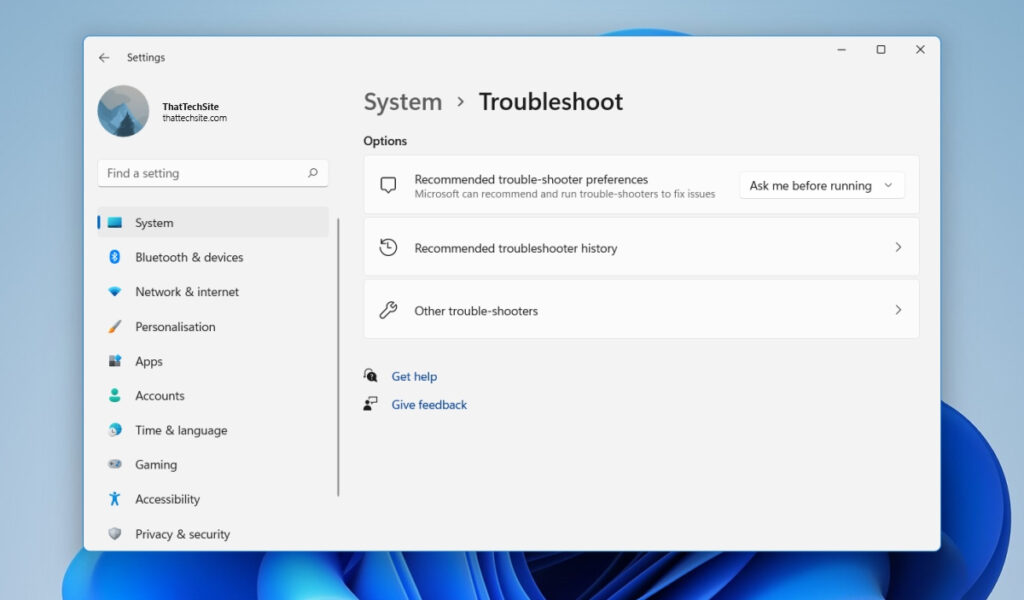
3. In the right pane, select Troubleshoot.
4. Next, under Options click on Other troubleshooters.
5. Click the Run button next to Internet Connections.
6. Lastly, click on Troubleshoot my connection to the internet.
The troubleshooter will begin scanning your system and recommend any potential fixes.
If the issue is not resolved, try running the Network Adapter Troubleshooter. To run this troubleshooter:
1. Press the Windows Key + I on your keyboard to open the Settings menu.
2. Next, open the System tab and navigate to Troubleshoot.
3. Under Options click on Other troubleshooters.
4. Finally, select the Run button next to Network Adapter.
Follow the on screen instructions, and apply any fixes if they are present.
Method 2: Enable the Wi-Fi Adapter in Windows 1R1
Windows 11 will not display the Wi-Fi option in the taskbar if the adapter is disabled. This adapter can be manually enabled or disabled in the Control Panel. Following the steps below, ensure that the Wi-Fi adapter is enabled on your Windows 11 machine.
1. Press the Windows Key + R on your keyboard to open the Run prompt.
2. Type “control” and click OK to open the Control Panel.
3. Next, navigate to Network and Internet and select Network and Sharing Center.
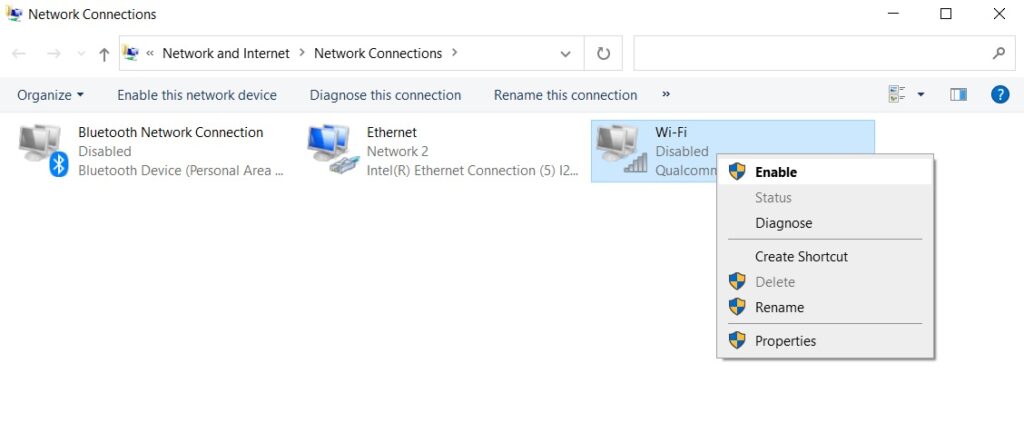
4. Finally, click on Change adapter settings in the left menu to view the installed network devices on your PC.
Here, you can right click on the Wi-Fi adapter and select “Enable” if the adapter is greyed out.
Once the adapter has been enabled, verify that the Wi-Fi option has reappeared in the system tray. If the adapter was already enabled, select Diagnose to run the Network Diagnostic tool. Finally, follow the troubleshooter prompts and apply any recommended system patches.
Method 3: Update the Network Drivers
When Windows 11 updates, there may be a corrupt or glitched network driver that can cause Wi-Fi connection issues. By manually updating the network driver to the latest version, you can resolve some of these potential glitches. To update the network drivers:
1. First, open the start menu and search for “Device Manager”.
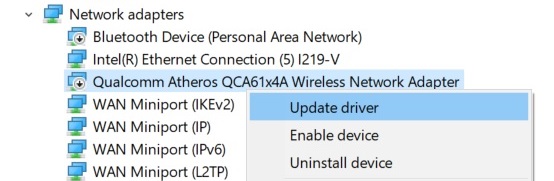
2. Next, open the Device Manager and expand the Network adapters section.
3. Right click the Wireless adapter and select Update driver.
4. Next, Select “Search automatically for drivers” and wait for Windows to scan and install the latest drivers.
Once complete, reboot your computer and verify that the Wi-Fi option has reappeared in the system tray. At this point, we hope to have answered the common question of how to fix a missing Wi-Fi option in Windows 11. However, if you are still experiencing issues, try the final method below.
Method 4: Perform a Network Reset
Using the default network reset tool that is built into Windows 11, users can remove and reinstall their network adapters. All network settings will also reset to the factory default which can fix outstanding configuration issues.
To perform a network reset:
1. Open the start menu and search for Settings.
2. Next, open the Settings menu and select the Network & Internet tab.
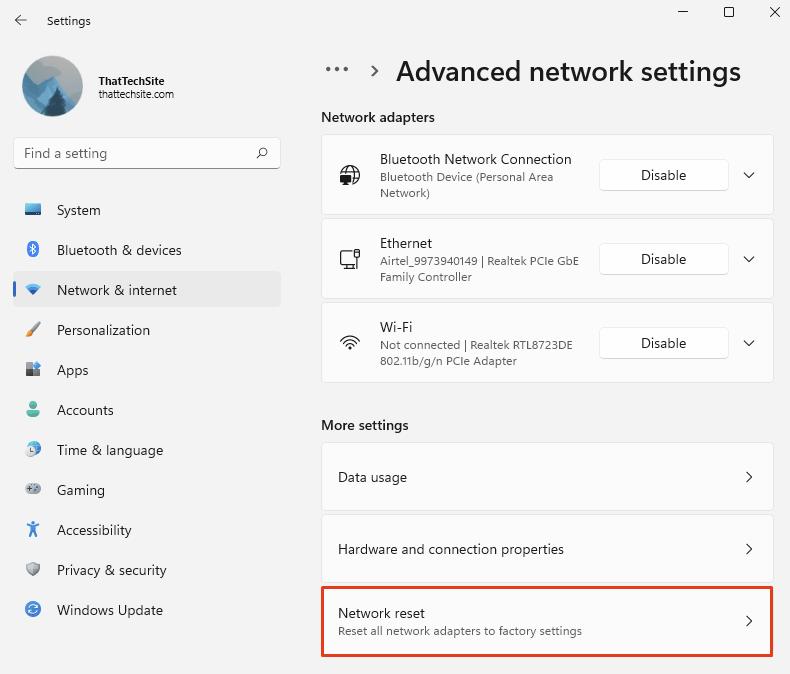
3. Scroll down and select Advanced network settings.
4. Next, select More settings and click on Network reset.
Once the reset is complete, reboot your PC and verify that the Wi-Fi option has returned in your system tray. You may need to enter Wi-Fi credentials as this tool resets all settings to default.
Conclusion
Overall, there are many different methods to fix the Wi-Fi option missing from Windows 11. From enabling the Wi-Fi adapter to updating drivers and performing a network reset, we hope that you were able to get your Windows 11 PC back online and connected to Wi-Fi. Leave a comment below if you have any questions!