NVIDIA drivers can be difficult to deal with. Sometimes they improve performance in games and applications, while other times they can cause blue screens, glitches, and stuttering. Lately, this has become a huge issue for Call of Duty Modern Warfare 2 players. Fortunately, there are a couple of easy ways to install old NVIDIA drivers on Windows 10/11, anyone can do it.
Installing old NVIDIA Drivers
The first thing that should be checked before installing old drivers is to make sure that the issues you are running into are driver related, and not related to another update or change that you had on your system. Ask yourself, did the game or application that is having issues have any recent updates? When was the last time I ran a malware scan? Did I restart my device after installing these latest drivers? Once you feel comfortable with the issue being related to your version of NVIDIA drivers, follow these methods.
Method 1: Rollback NVIDIA Drivers
If there were previously installed video drivers on the system, Windows has a built in feature to rollback your drivers. To do this, we will need to open the device manager and edit the driver properties.
1. Open the Start Menu and type Device Manager.
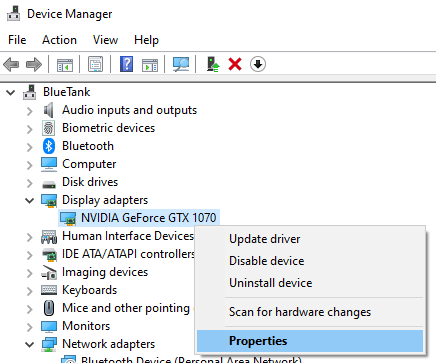
2. Open the drop down menu under Display adapters and find your primary graphic card.
3. Right click your graphic card and select Properties.
4. Go to the Driver tab at the top of the window and select Roll Back Driver.
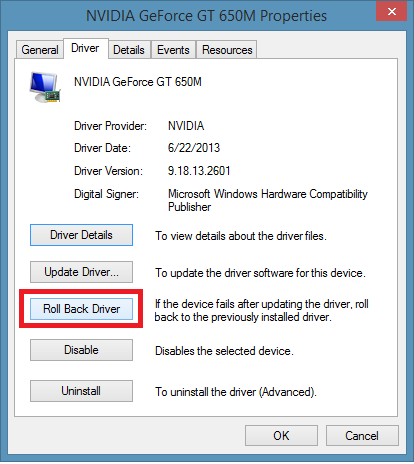
5. Follow the on screen steps and Windows 10/11 will install the previous driver.
Method 2: Uninstall the current driver and install an older version
In the first method, we answered how to install old NVIDIA drivers on Windows 10/11 with the device manager. Although this is the easiest method, the Roll Back Driver button may be greyed out. This means that there are no previous drivers currently saved on the device.
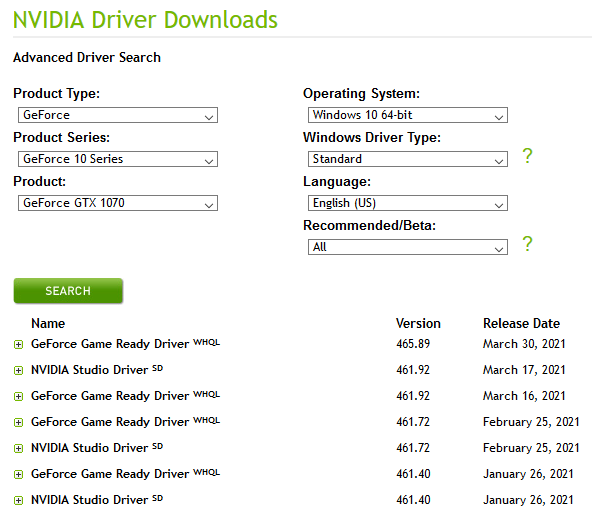
To manually roll back your NVIDIA driver, start by navigating to the NVIDIA Advanced Driver Search webpage and input your graphic card information.
Note that if you do not know what graphic card you have on your computer, you can find the name under your Device Manager, as shown in the previous method.
Once you input your system information, click search and download the desired driver for your PC. We recommend choosing a previously released GeForce Game Ready Driver.
Now that you have a driver ready to install, we must uninstall the driver currently installed on the computer.
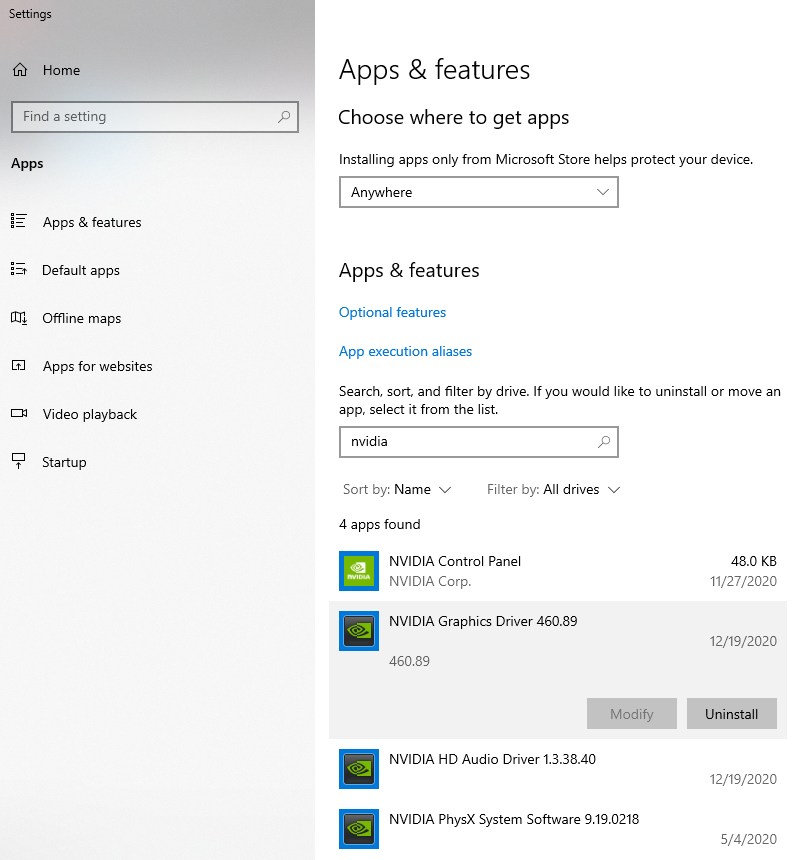
1. Right click the Start Menu and select Apps and Features at the top of the list.
2. Search the term NVIDIA and uninstall all of the drivers by clicking on the name and selecting uninstall.
Once complete, restart your system and install the NVIDIA driver that you previously downloaded from NVIDIA’s Advanced Driver Search webpage. Finally, reboot your computer one last time and you will be running an old NVIDIA driver on your Windows 10/11 computer.
Conclusion
Following two easy methods, anyone can easily install an old version of NVIDIA drivers on their Windows 10/11 computer. Although there may be more steps required for users who do not have previous drivers saved on their computer, this fix shouldn’t take more than 10 minutes. Let us know in the comments if this fixed your driver issues!
This is a great article! I have been struggling to find a way to install the old NVIDIA drivers on my Windows 10/11 computer. This article has provided me with the information I need. Thank you for writing it!